Member Management
Applicable role: Admin user Last updated: 2026-08-06
Members are the callers (colleagues, developers) under your organization. This chapter covers how to create members, set their quotas, assign departments, authorize groups, and manage them day-to-day.
Only admin users can access this page. Members do not see "Member Management" after logging in.
1. What Is a Member
- Members can log into the console but see fewer menus than the admin user. Basic entries include Dashboard, API Key, Default Model Config, Usage Records, Profile, My Subscriptions, and Call Guide. The "Call Guide" menu is always visible; however, if you turn off the group identifier routing switch, the group identifier call names on that page become unavailable, and calls with group identifiers will be rejected.
- Members do not have independent balances; pay-as-you-go calls are deducted from the organization balance.
- You can set a quota pool limit (in credits) for each member, capping how much they can spend.
- No matter how many Keys a member creates, they all share the same quota.
2. Entry Point and Five Tabs
Left menu -> Member Management (/sub-users). The top of the page has five persistent tabs:
| Tab | Purpose |
|---|---|
| Overview | View organization-level usage summary (admin user and all members) |
| Member List | Create and manage all members; the most frequently used tab |
| Department Management | Build a tree-structured department hierarchy, assign members to departments, and set department-level default quotas and default resources (see Section 7 below) |
| Subscription Inventory | View subscription seat inventory and enter seat management; may be empty if there are no subscriptions (see Subscriptions) |
| Settings | Manage organization name, default group assignment for members, default quota pool limit for members, group identifier routing, and other organization-level settings (see Section 8 below) |
The five tabs above are always present. Organizations with Lark approval enabled will see an additional "Approval Records" tab.
Member management page:
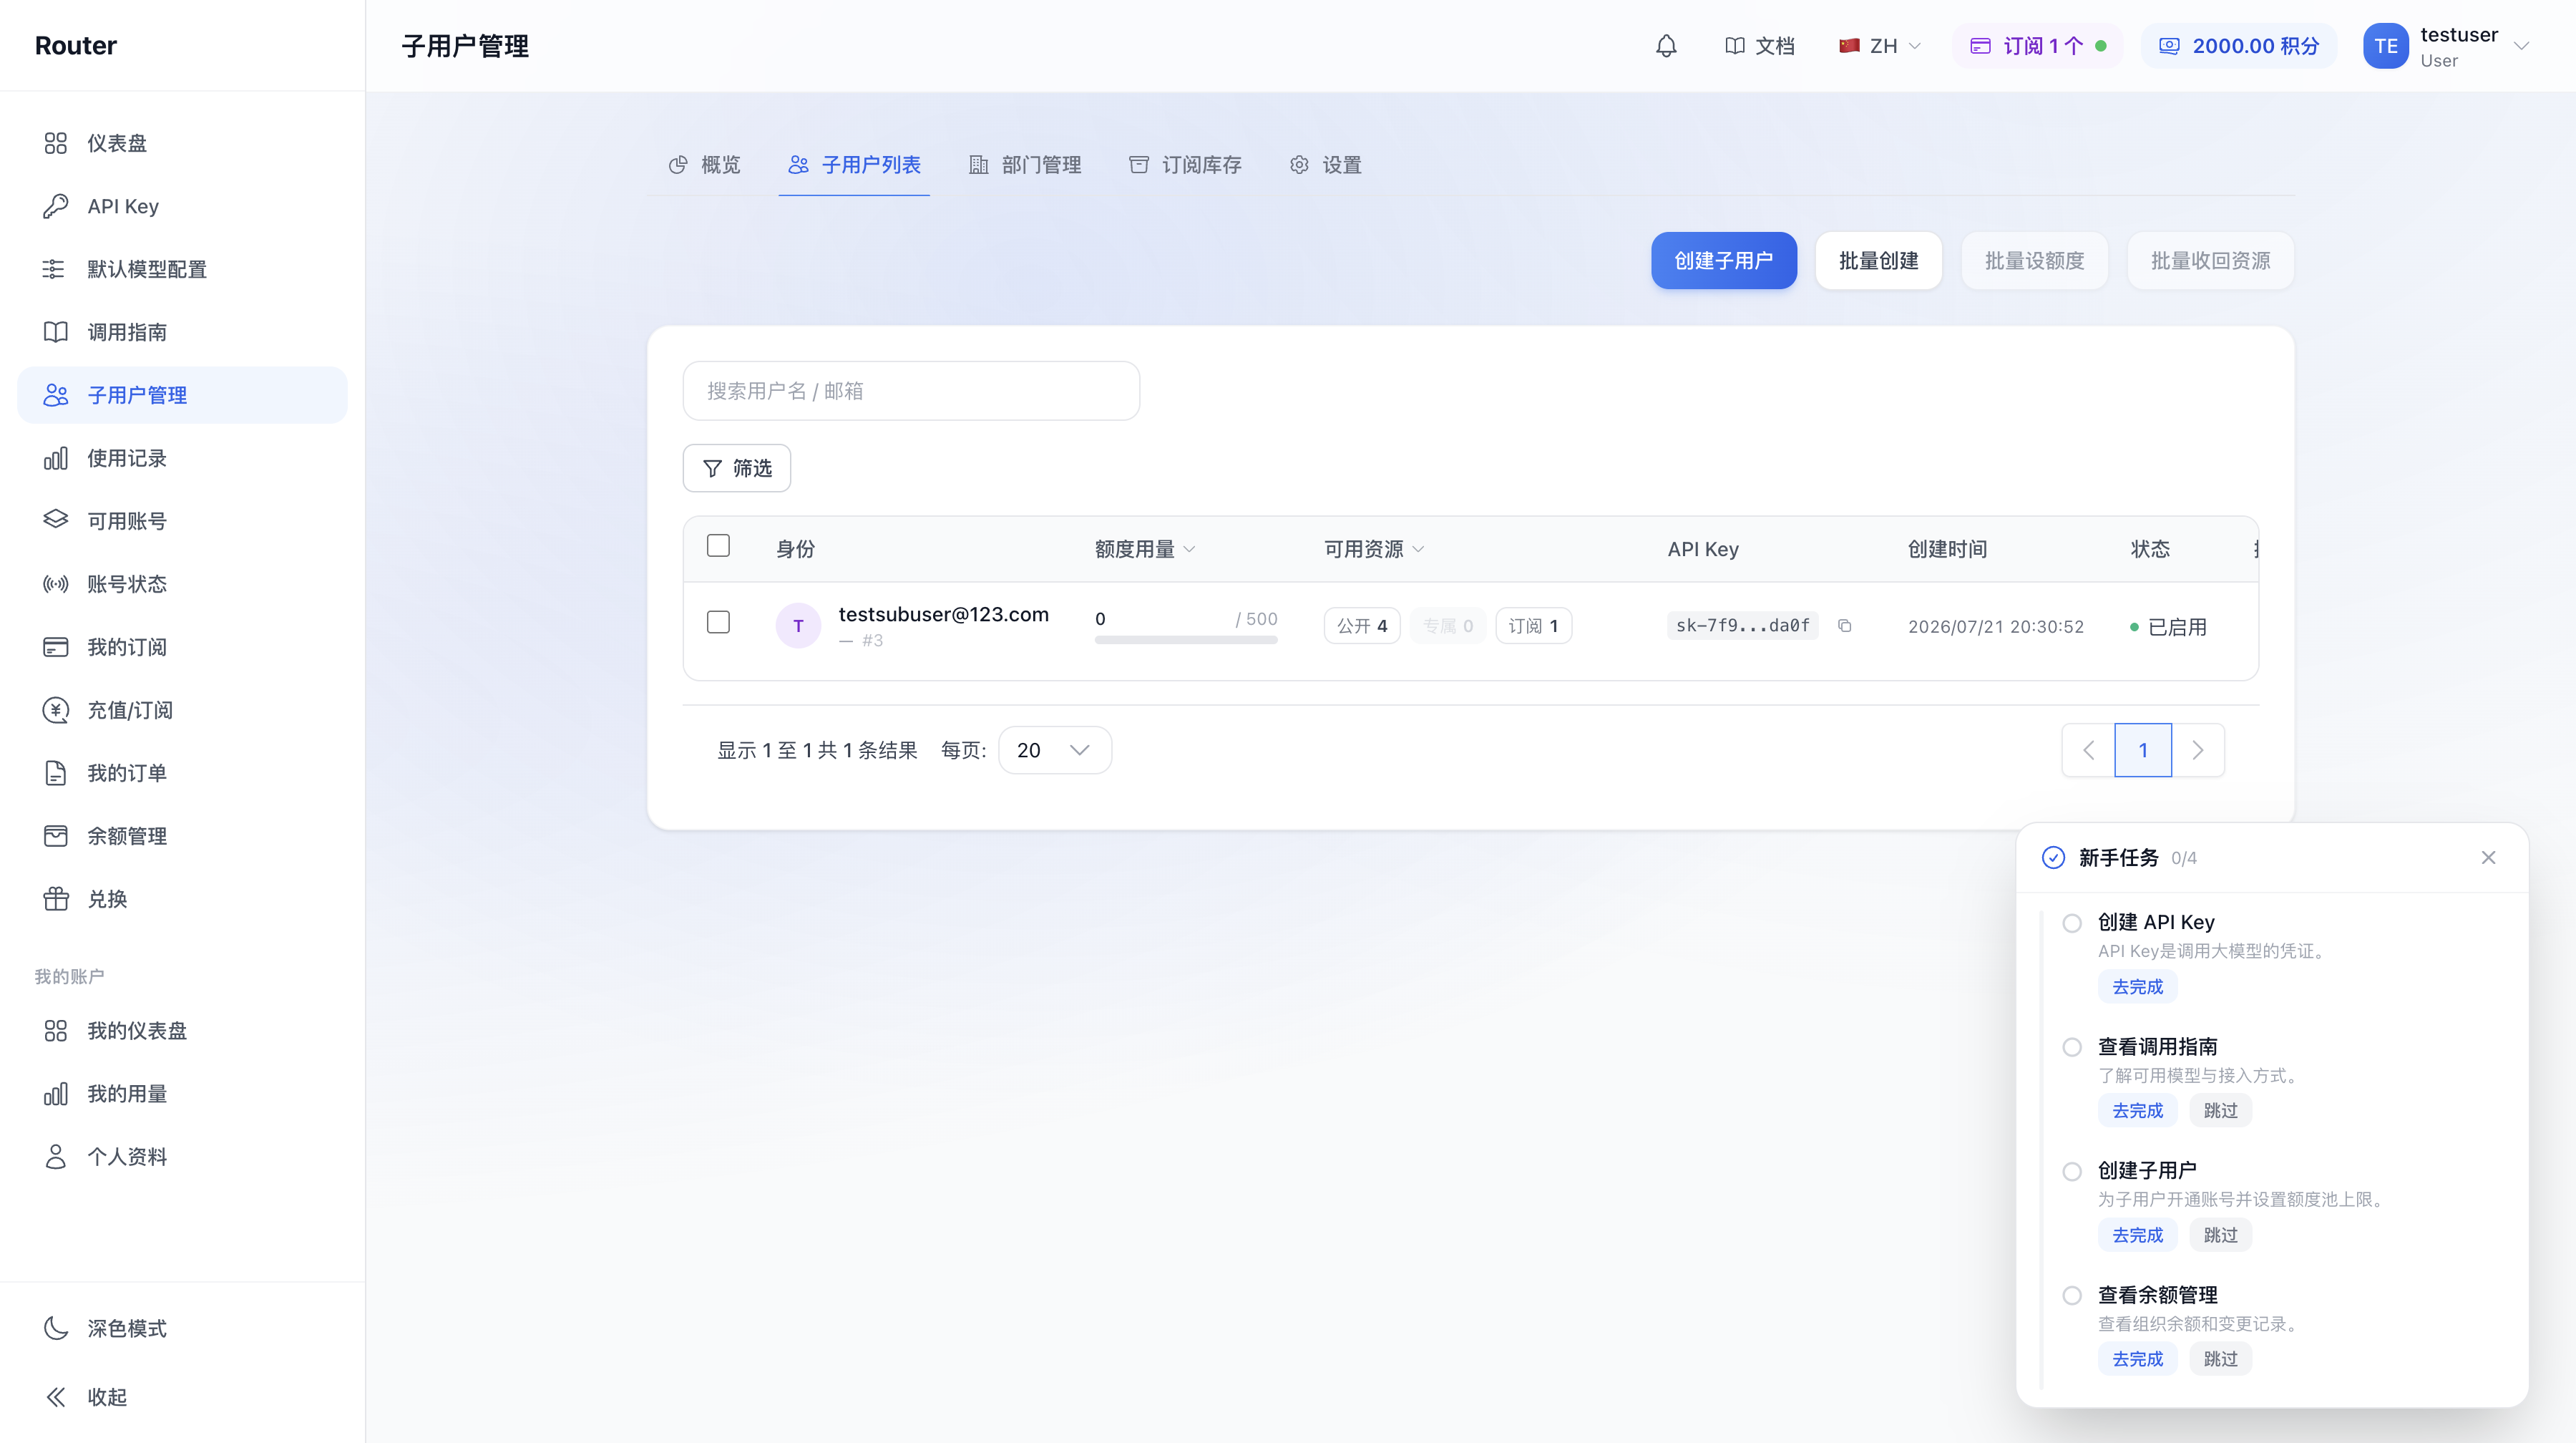
What the List Looks Like
Toolbar: Create Member, Batch Create, Batch Set Quota, Batch Revoke Resources; search box placeholder "Search by username / email". Below the search box is a separate filter bar for narrowing the list by criteria.
Table columns:
| Column | Description |
|---|---|
| Identity | Username and email. Members not yet activated show a placeholder email |
| Quota Usage | The spending limit you set and how much has been used (combined in one column). Unlimited shows "Unlimited" |
| Available Resources | Number of groups available to this member, categorized as public / exclusive / subscription; click to view details |
| API Key | Masked display of this member's initial API Key; click the icon to copy |
| Created At | When this member was created |
| Status | Enabled / Disabled / Pending Activation |
| Actions | Edit, Available Groups, More Actions (includes Resend Activation Code, Delete); "Resend Activation Code" only appears for pending activation status |
The available group count in the list is based on the current user's permissions and may be fewer than the total groups enabled for the organization.
3. Creating a Member
- On the "Member List" tab, click "Create Member".
- Fill in the following fields in the dialog (most can be left empty):
| Field | Required | Description |
|---|---|---|
| Delivery Email | Optional | Used only to send the activation code / activation link to this email, making it easy to pass to the member. This is not the login email (the login email is set by the member during activation). If left empty, no email is sent automatically; you need to manually pass the activation code to them |
| Username | Optional | An internal display name for easy identification in the list (e.g., "Finance-Zhang San"). Does not affect login or billing; can be changed later |
| Initial Quota Pool (credits) | Optional | The initial spending limit for this member. Page hint: empty = use the organization's default quota pool limit; 0 = unlimited quota |
| Department (multi-select) | Optional | Click "Select Department" to assign them to one or more departments (departments must be created first in the "Department Management" tab). This is just a convenience at creation time; you can add/remove department membership anytime in the "Department Management" tab |
| RPM Limit | Optional | Maximum calls per minute for their Keys. Empty or 0 = unlimited |
| Concurrency Limit | Optional | Maximum concurrent requests their Keys can handle simultaneously. Empty or 0 = unlimited, but cannot exceed the admin user's concurrency limit |
| Activation Code Never Expires | Optional | Check to make the activation code permanent; unchecked defaults to 7-day validity |
- Click "Create".
Configuration dialog after clicking "Create Member":
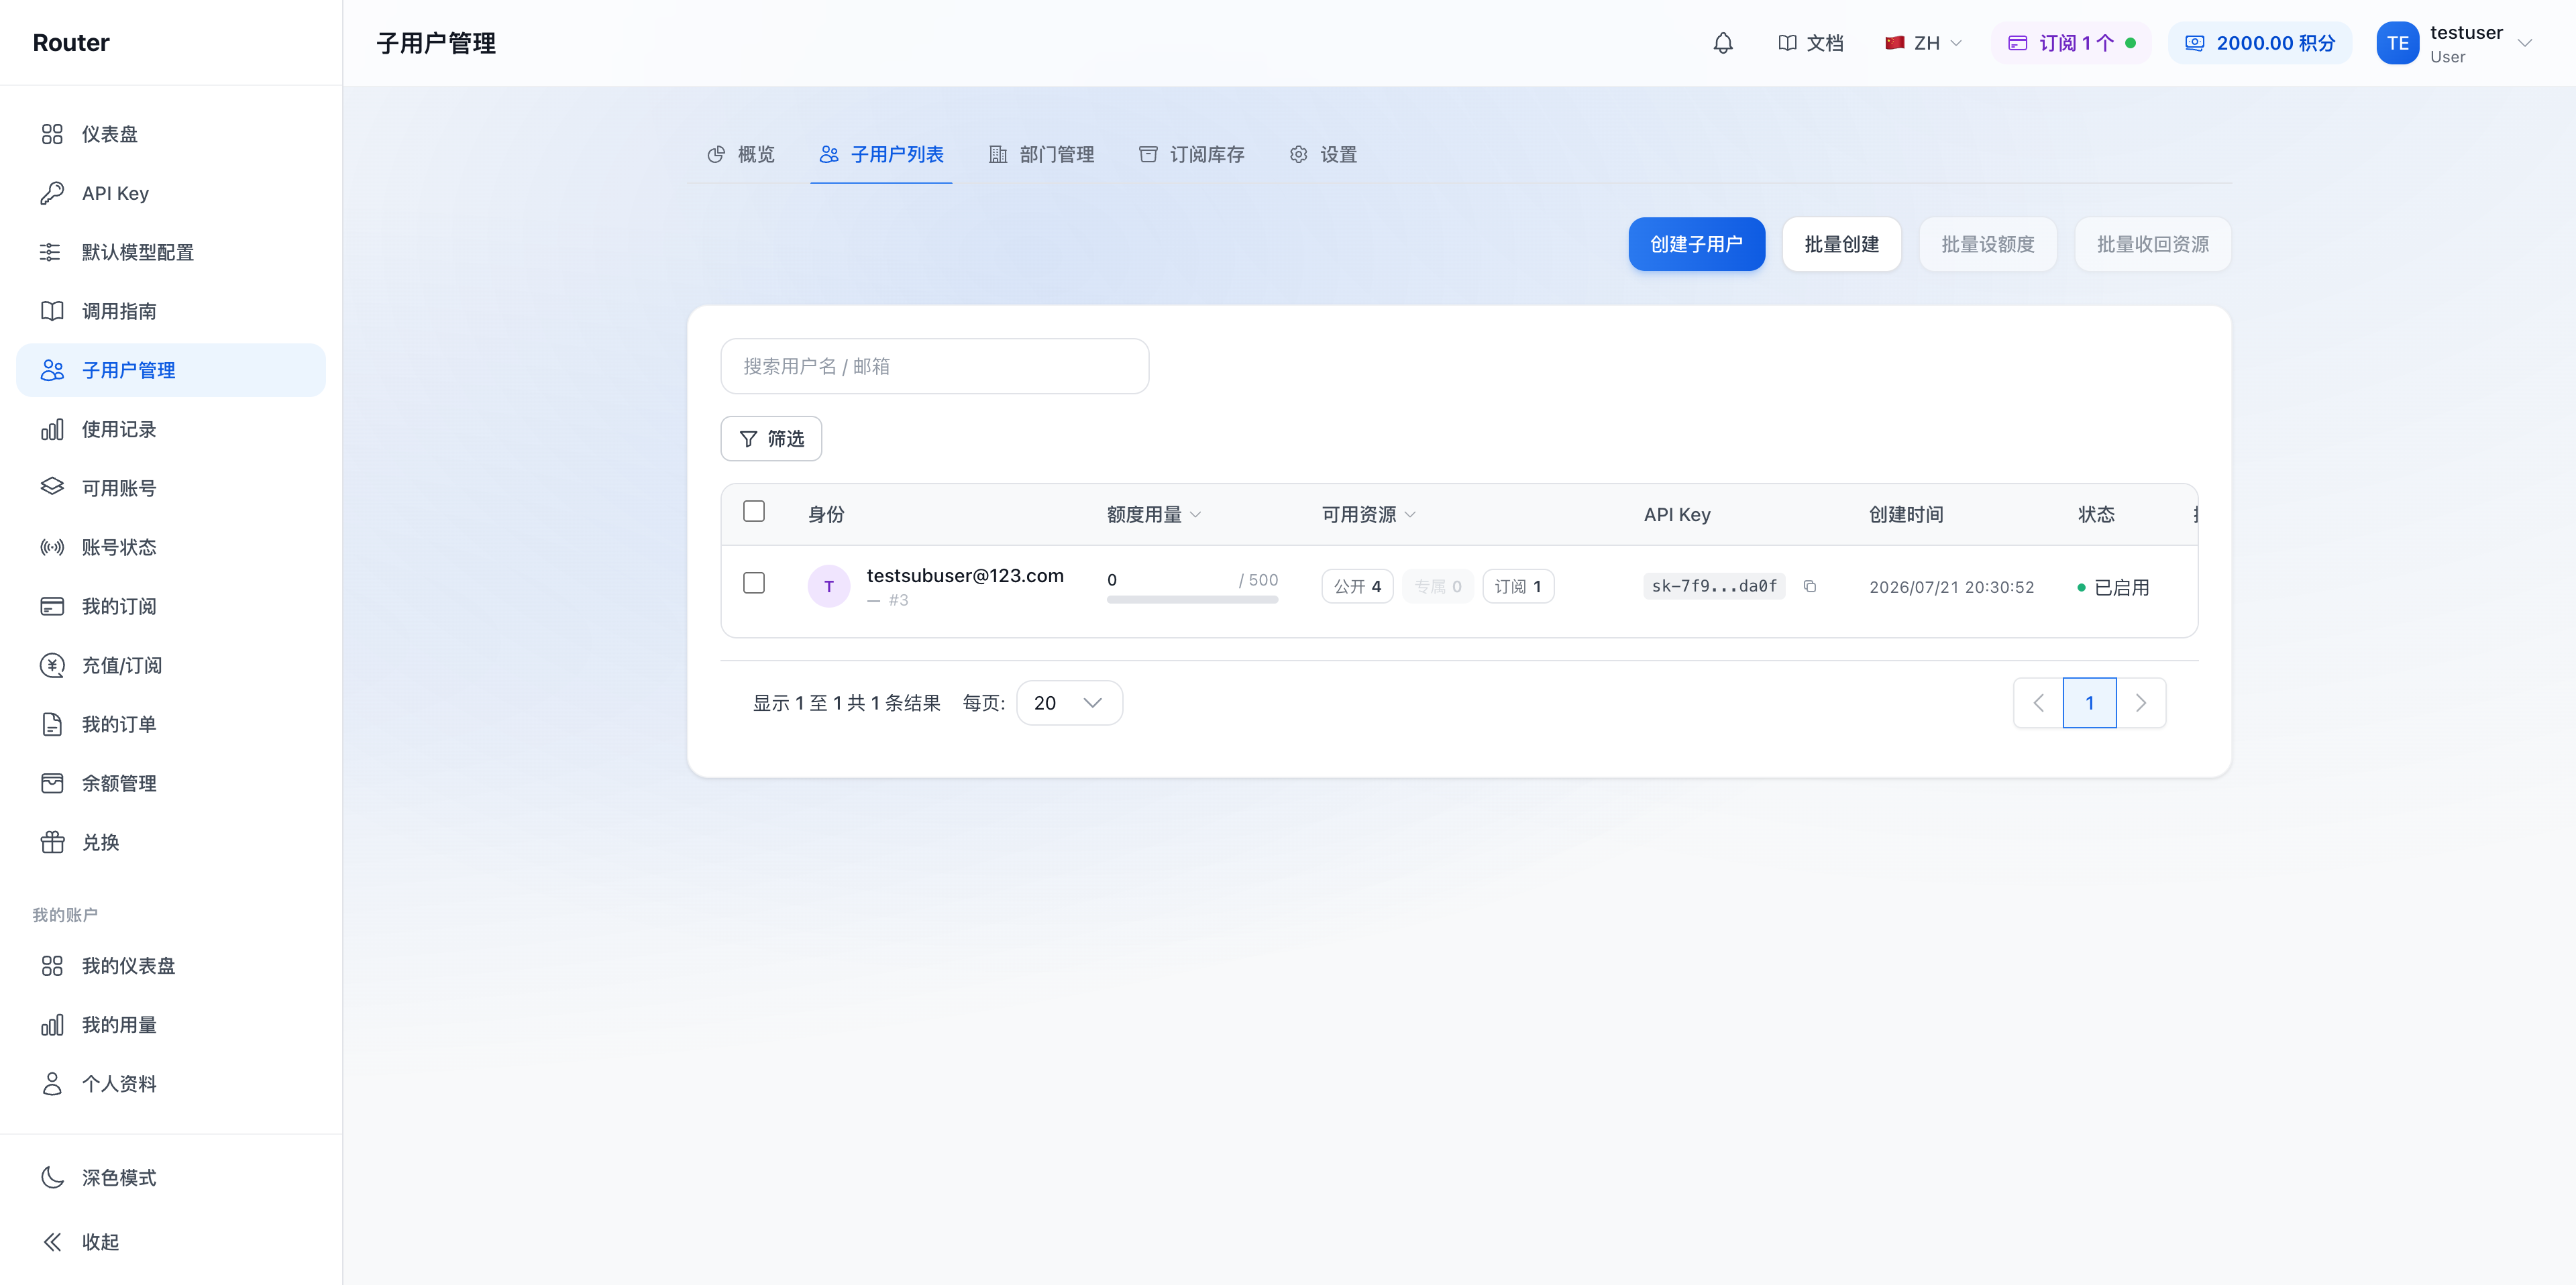
Note: After successful creation, the activation code, activation link, and initial API Key are displayed once. Copy them immediately and pass them through a secure channel; the full information will not be shown again after closing the dialog.
4. Member Activation and Login
Members do not use the public registration page. Instead, they register using the activation code you provide:
- After creating a member, you get the activation code (if a delivery email was provided, it is sent there; otherwise, copy and share it manually).
- Pass the activation code to the corresponding colleague through a secure channel.
- They open the activation page, register using the activation code, and set their own login email and password.
- Once activated, they can log in. The list status changes to "Enabled".
Pass the activation code through a secure channel to prevent unauthorized use.
5. Setting / Adjusting Member Quotas
The quota is the maximum amount this member can spend (in credits), set when creating or editing a member. Key points:
- Setting a quota does not transfer balance; the quota only limits this member's pay-as-you-go spending cap.
- The actual deduction comes from the organization's credit balance (total quota pool). Costs incurred by member calls are deducted from the organization's funds.
- Multiple Keys under one member share the same quota. Each Key does not have its own quota.
- When the quota is exhausted, all Keys under this member are rejected simultaneously, until you increase their quota (provided the organization pool still has funds).
- Quota changes take effect immediately, whether increasing or decreasing.
For batch scenarios, use the toolbar's "Batch Set Quota" to set quotas for multiple members at once. For complete details on funds and quotas, see Balance and Quota.
6. Managing Existing Members
In the "Member List", each member row has the following actions:
- Edit: Change username, quota pool limit, RPM limit, concurrency limit, and status (Enabled / Disabled). (Note: Delivery email cannot be changed in the edit dialog. Department assignment is not changed here either; use the "Department Management" tab to add/remove members -- see Section 7.)
- Available Groups: Manage which groups this member can use. All are available by default; this is mainly used to disable specific groups for individual members. If the organization has switched "Default Group Assignment for Members" to manual assignment, exclusive groups need to be enabled here one by one. Public groups are always available and are not affected by this toggle.
- More Actions: Contains "Resend Activation Code" (visible only for pending activation members) and "Delete". Delete removes this member from the organization.
The copy icon in the API Key column copies this member's initial API Key; it is not in the "Actions" column.
Understanding the "Available Groups" Dialog
This dialog is now a member resource view with unified grant and revoke operations:
- Groups are displayed by tab category. If a tab has no groups to authorize, it explains why it is empty rather than showing a blank page.
- Groups hidden by group authorization scope do not appear in the list, but the dialog shows a hint such as "An additional {count} international route groups are unavailable because the current admin account has not activated international models, and are therefore not listed here." Seeing such hints means the current user has not been granted the corresponding groups; see Model Access and Groups.
- Members not yet activated are marked "Pending Activation"; authorization can still be configured in advance and takes effect immediately upon activation.
Want to restrict a member? Three methods: change Status to "Disabled" in the "Edit" dialog (they immediately lose login access and all their Keys are disabled); or lower / exhaust their quota pool limit (once the quota is empty, all Keys are rejected); or Delete them directly.
Note on post-deletion usage aggregation: After a member is deleted, their historical usage is aggregated under the organization and no longer retained per individual. If you need per-person details, export them before deletion.
7. Department Management
"Department Management" is the second tab on the "Member Management" page (/sub-users/departments). It lets you organize members into departments by organizational structure, making it easy to group people by department and set department-level default quota pool limits and default resources. Departments are tree-structured: you can have root departments, sub-departments, and multiple nesting levels.
Departments are optional. Members work perfectly fine without departments. If you have a small team, you can skip this tab entirely.
Department management page (example: R&D -> Frontend Team / Backend Team, Finance):
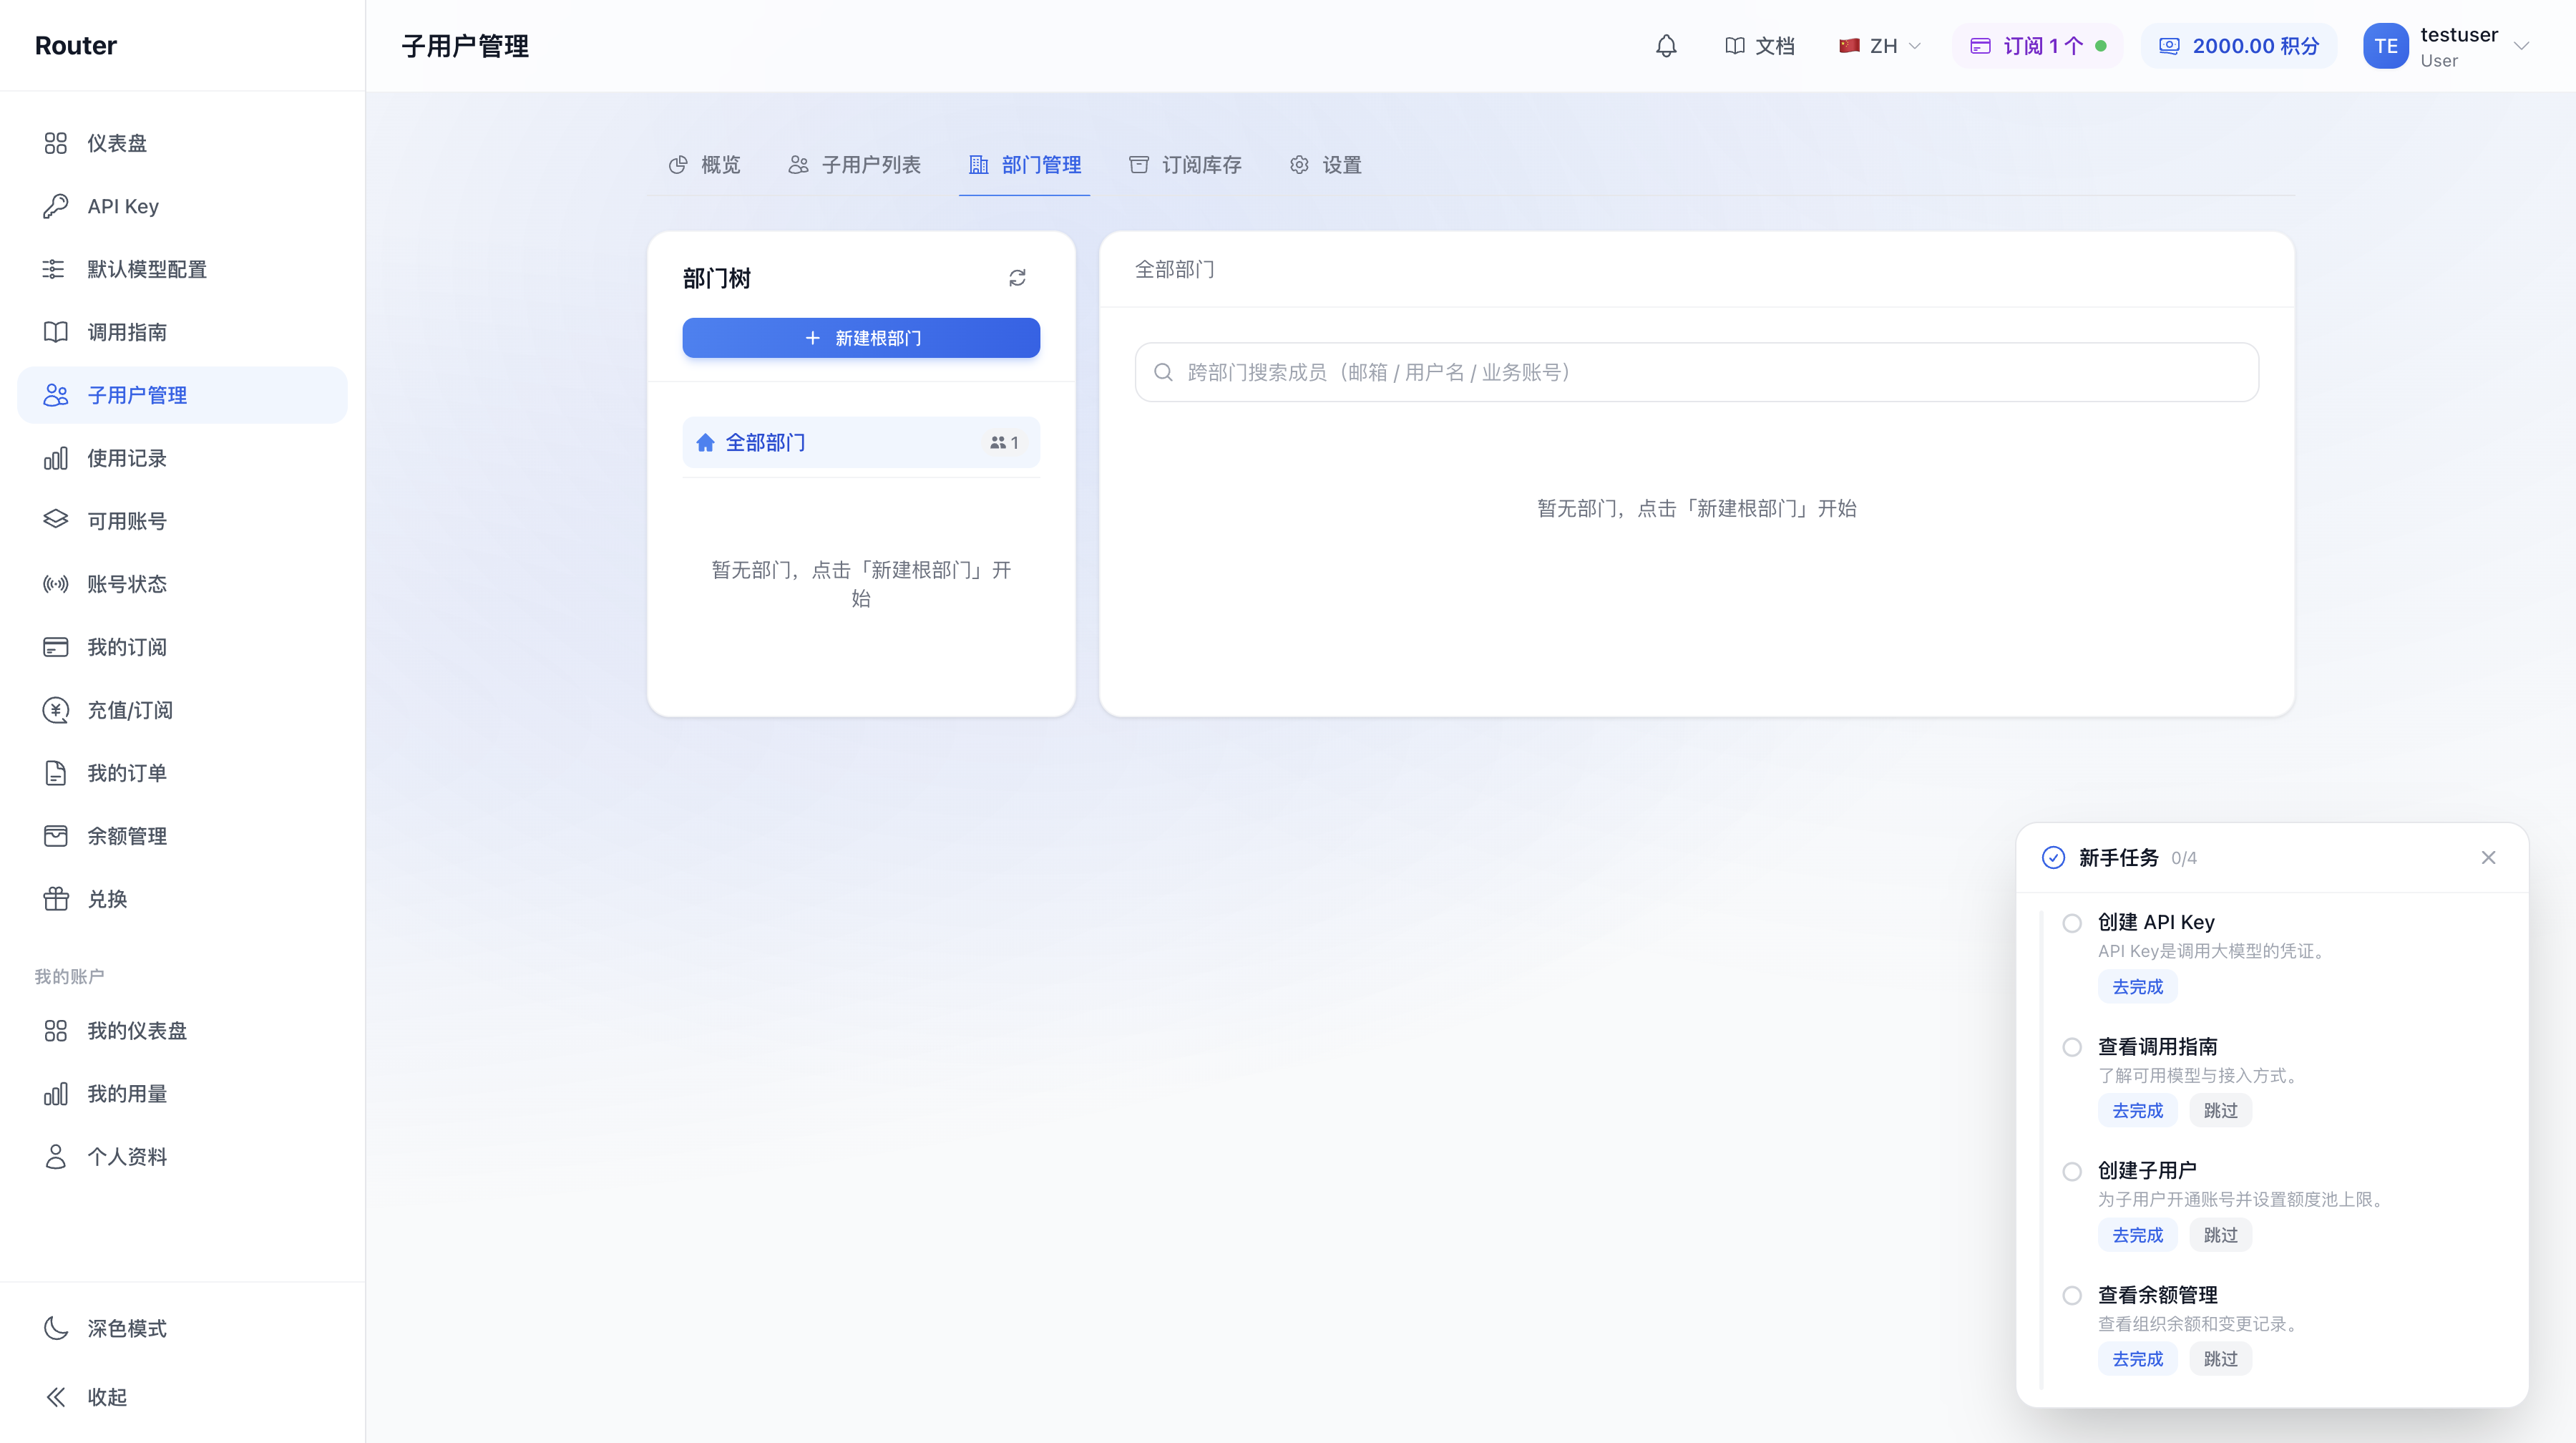
Page Layout (Two Columns)
- Left: "Department Tree": The full department hierarchy, with member counts shown after each department name (e.g., "3 members"). Expandable/collapsible, with a refresh button. When no departments exist, it shows "No departments yet. Click 'Create Root Department' to start".
- Right: "Department Members": After selecting a department on the left, the right side lists its members. When no department is selected, it shows "Please select a department on the left to view its members".
- Cross-department search: In the "Department Members" card on the right, below the breadcrumb, with placeholder text "Search members across departments (email / username / business account)". Use it to find anyone in the organization and see which departments they belong to (including those not assigned to any department).
Creating / Editing / Deleting Departments
Operations on the department tree:
- Create Root Department / Create Sub-Department: Click "Create Sub-Department" under a department to nest it as a child, forming the hierarchy.
- Edit: Change the department name and set the "Default Quota Pool Limit for Members" (see below).
- Delete: The department must be empty first. If it still has sub-departments or members, it cannot be deleted; the system prompts you to remove them first.
- Department hierarchy can be adjusted, but you cannot move a department under itself or its own children (this would create a loop; the system blocks it).
Department Members: Adding / Removing
- Add Members: Click "Add Members" on the right, select the members to add to this department (searchable by email / username). A member can belong to multiple departments simultaneously.
- Remove from Department: Removing someone from a department only removes them from that department. It does not affect their account or their membership in other departments.
- Member list columns: email, username, business account, actions; each person also shows their department memberships. Status can be Active / Disabled / Pending Activation; pagination for large lists.
Remember: Department assignment is managed in this tab, not in the "Member List" edit dialog. You can assign departments at member creation time, but subsequent changes are done here by adding/removing members.
Department Default Quota Pool Limit (Convenient Batch Default)
When creating or editing a department, you can set a "Default Quota Pool Limit for Members". Its purpose: when new members are created under this department without specifying a quota, this department default is automatically applied, saving you from filling it in for each person. Rules:
- Empty = inherit (checks this department -> parent department -> organization default; the organization default is set in the "Settings" tab under "Default Quota Pool Limit for Members" -- see Section 8 -> then falls back to 0).
- 0 = unlimited.
- A specific number = use that value.
- When a person belongs to multiple departments, the largest limit among them is used.
- Note: This only takes effect at the moment of member creation; it does not change existing members' quotas. To adjust existing member quotas, use "Edit" in the "Member List" or "Batch Set Quota".
Department Default Resources (Pre-configuring Groups and Subscription Seats)
After selecting a department, the right panel also has a "Default Resources" button for configuring a set of default resources for that department:
- Default Exclusive Groups: Once checked, members in this department automatically receive these exclusive groups.
- Default Subscription Seats: Specify how many subscription seats to distribute for the department. Can be set as exclusive (one seat per person) or shared (multiple people share one seat); for shared seats, you can also set the number of people per seat.
Once configured, members in that department automatically receive these default resources without manual per-person authorization.
8. "Settings" Tab: Organization-Level Settings
The "Settings" tab has four sections:
| Setting | Description |
|---|---|
| Organization Name | Change your organization's display name |
| Default Group Assignment for Members | Whether exclusive groups are automatically granted or manually assigned when creating members. Default is automatic; switching to manual requires enabling exclusive groups individually in each member's "Available Groups" |
| Default Quota Pool Limit for Members | The organization-level default quota value. When creating a member without specifying a quota and the department has no default set either, this value is used as fallback (see Section 7) |
| Group Identifier Routing | Advanced toggle; see below. This section is conditionally rendered and does not appear if the site has not enabled this feature |
Group Identifier Routing Toggle (Most Users Don't Need This)
When enabled, you and your members can use the "full notation with group identifier" to temporarily direct a call through a specific group (see API Keys and Routing for details).
- This toggle can only be controlled by you (the admin user); members follow your setting and cannot change it themselves.
- When off, the "Call Guide" menu remains visible, but group identifier call names on the page become unavailable, and calls with group identifiers are rejected. This does not affect normal calls using plain model names.
- Turning off: triggers a confirmation dialog. Turning on: takes effect immediately.
This toggle can be operated in two places: the "Settings" tab here, and the top of the "API Key" page. If the site has not enabled this feature, neither entry point is displayed.
9. About Activation Links
After successfully creating a member, the dialog provides both an activation code and an activation link with the code pre-filled. You can copy the link directly and send it to the colleague, who then fills in their login email and password to complete activation. There is currently no separate "Invitation Management" entry; to re-invite an unactivated user, use "Resend Activation Code" in the list.
10. FAQ
Q: Can members create their own Keys? A: Yes. They can click "Create API Key" on the "API Key" page, but the available groups are limited to those you have authorized for them.
Q: How do I let a member use a specific group? A: All groups are available by default, so usually no extra action is needed. If the organization has switched "Default Group Assignment for Members" to manual, go to their row and click "Available Groups" to enable the corresponding exclusive groups. Public groups are always available.
Q: How do I restrict a member? A: Change Status to "Disabled" in the "Edit" dialog (they immediately lose login access and all their Keys are disabled); or lower/exhaust their quota pool limit (once empty, all Keys are rejected); or disable specific groups in "Available Groups"; or delete them directly.
Q: Do multiple Keys under one member each have their own quota? A: No. All Keys under one member share the same quota and accumulate together.
Q: Is a member's usage retained after deletion? A: It is aggregated under the organization and no longer retained per individual. Export details before deletion if needed.
Q: Can usernames be duplicated? A: The system currently does not enforce unique username checks. It is recommended to establish a naming convention to avoid confusion.
Q: What if I forgot to copy the activation code / API Key after creation? A: The full API Key cannot be retrieved; you need to delete and recreate it. For unactivated members, use "Resend Activation Code" in the list to generate a new activation code and link.
Q: Do I have to create departments? A: No. Departments are optional and mainly useful for grouping people and setting department-level default quotas. Small teams can skip departments entirely.
Q: Can a member belong to multiple departments? A: Yes. In "Department Management", the same person can be added to multiple departments. When department default quotas are involved, the largest limit among the departments is used.
Q: If I delete a department, will the members in it be deleted? A: No. Furthermore, a department cannot be deleted while it still has members or sub-departments. You must remove members and handle sub-departments first. Removing from a department only removes the assignment; it does not affect the member's account.