Organization Registration
Applicable roles: Admin user Last updated: 2026-08-06
This page explains how to register and create an organization account. After successful registration, you become the admin user of the organization, with an independent credit balance (total quota pool), member management, and API Key capabilities.
Members do not use this registration flow. Members are created by the admin user and complete registration using an activation code. See Member Management for details.
1. What Is an Organization
In the new console, an organization is the basic unit for using platform services. An organization represents an enterprise, team, or individual account, with its own quota pool, API Keys, available model scope, and usage statistics.
During registration, the system creates an admin user account. As the registrant, you become the admin user of this organization and can subsequently create and manage members under it.
An organization corresponds to the legacy "tenant". If you are a legacy user, your account has been seamlessly upgraded -- no re-registration needed. See Migration Guide for details.
2. Before You Register
Before starting registration, have the following information ready:
| Item | Description |
|---|---|
| Email address | Used for login and receiving verification codes; a work email is recommended |
| Password | Used for account login; a strong password is recommended |
| Region | Displayed and required when the platform enables region-based access; hidden when not enabled |
| Invitation code | Required only when the platform enables invitation-code registration |
| Promo code | Optional; grants bonus credits upon successful registration |
The registration form itself does not collect organization name, contact person name, or phone number -- these are completed in the console after registration. The exact fields required are subject to what the registration page actually displays.
3. Registration Steps
Step 1: Open the Registration Page
Visit the platform console registration page.
Login page:
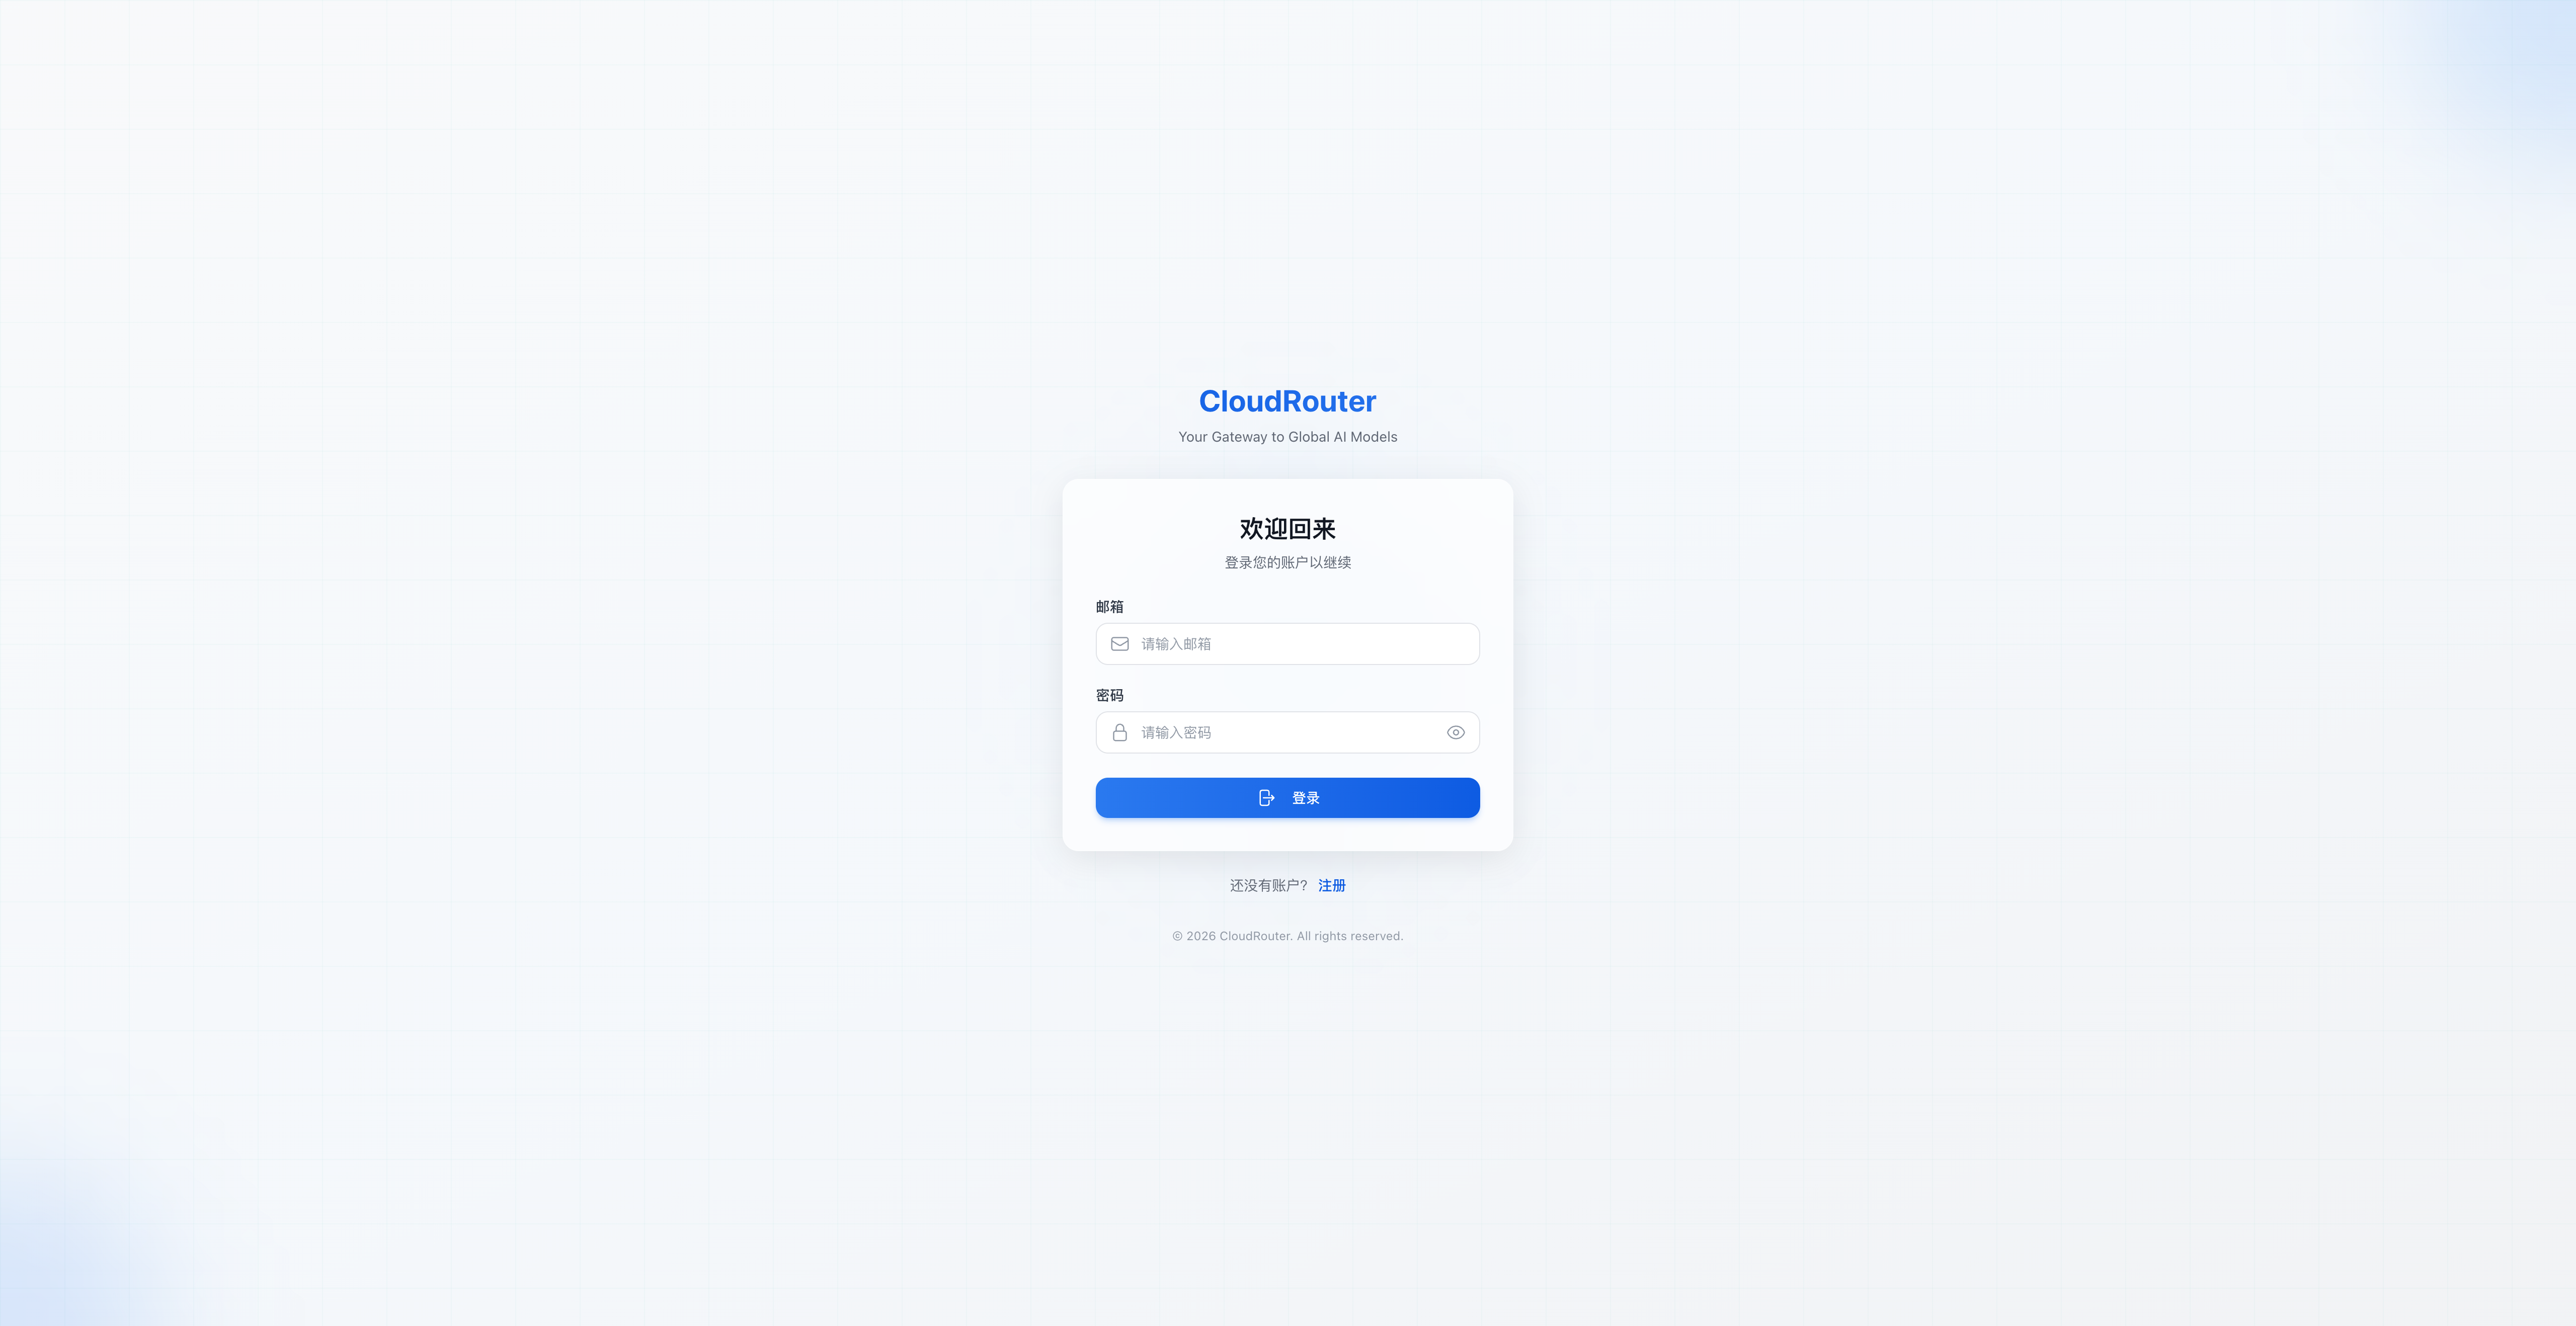
If you access via a referral link, the registration page will automatically fill in the promo code, and you will receive bonus credits upon successful registration.
Registration page:
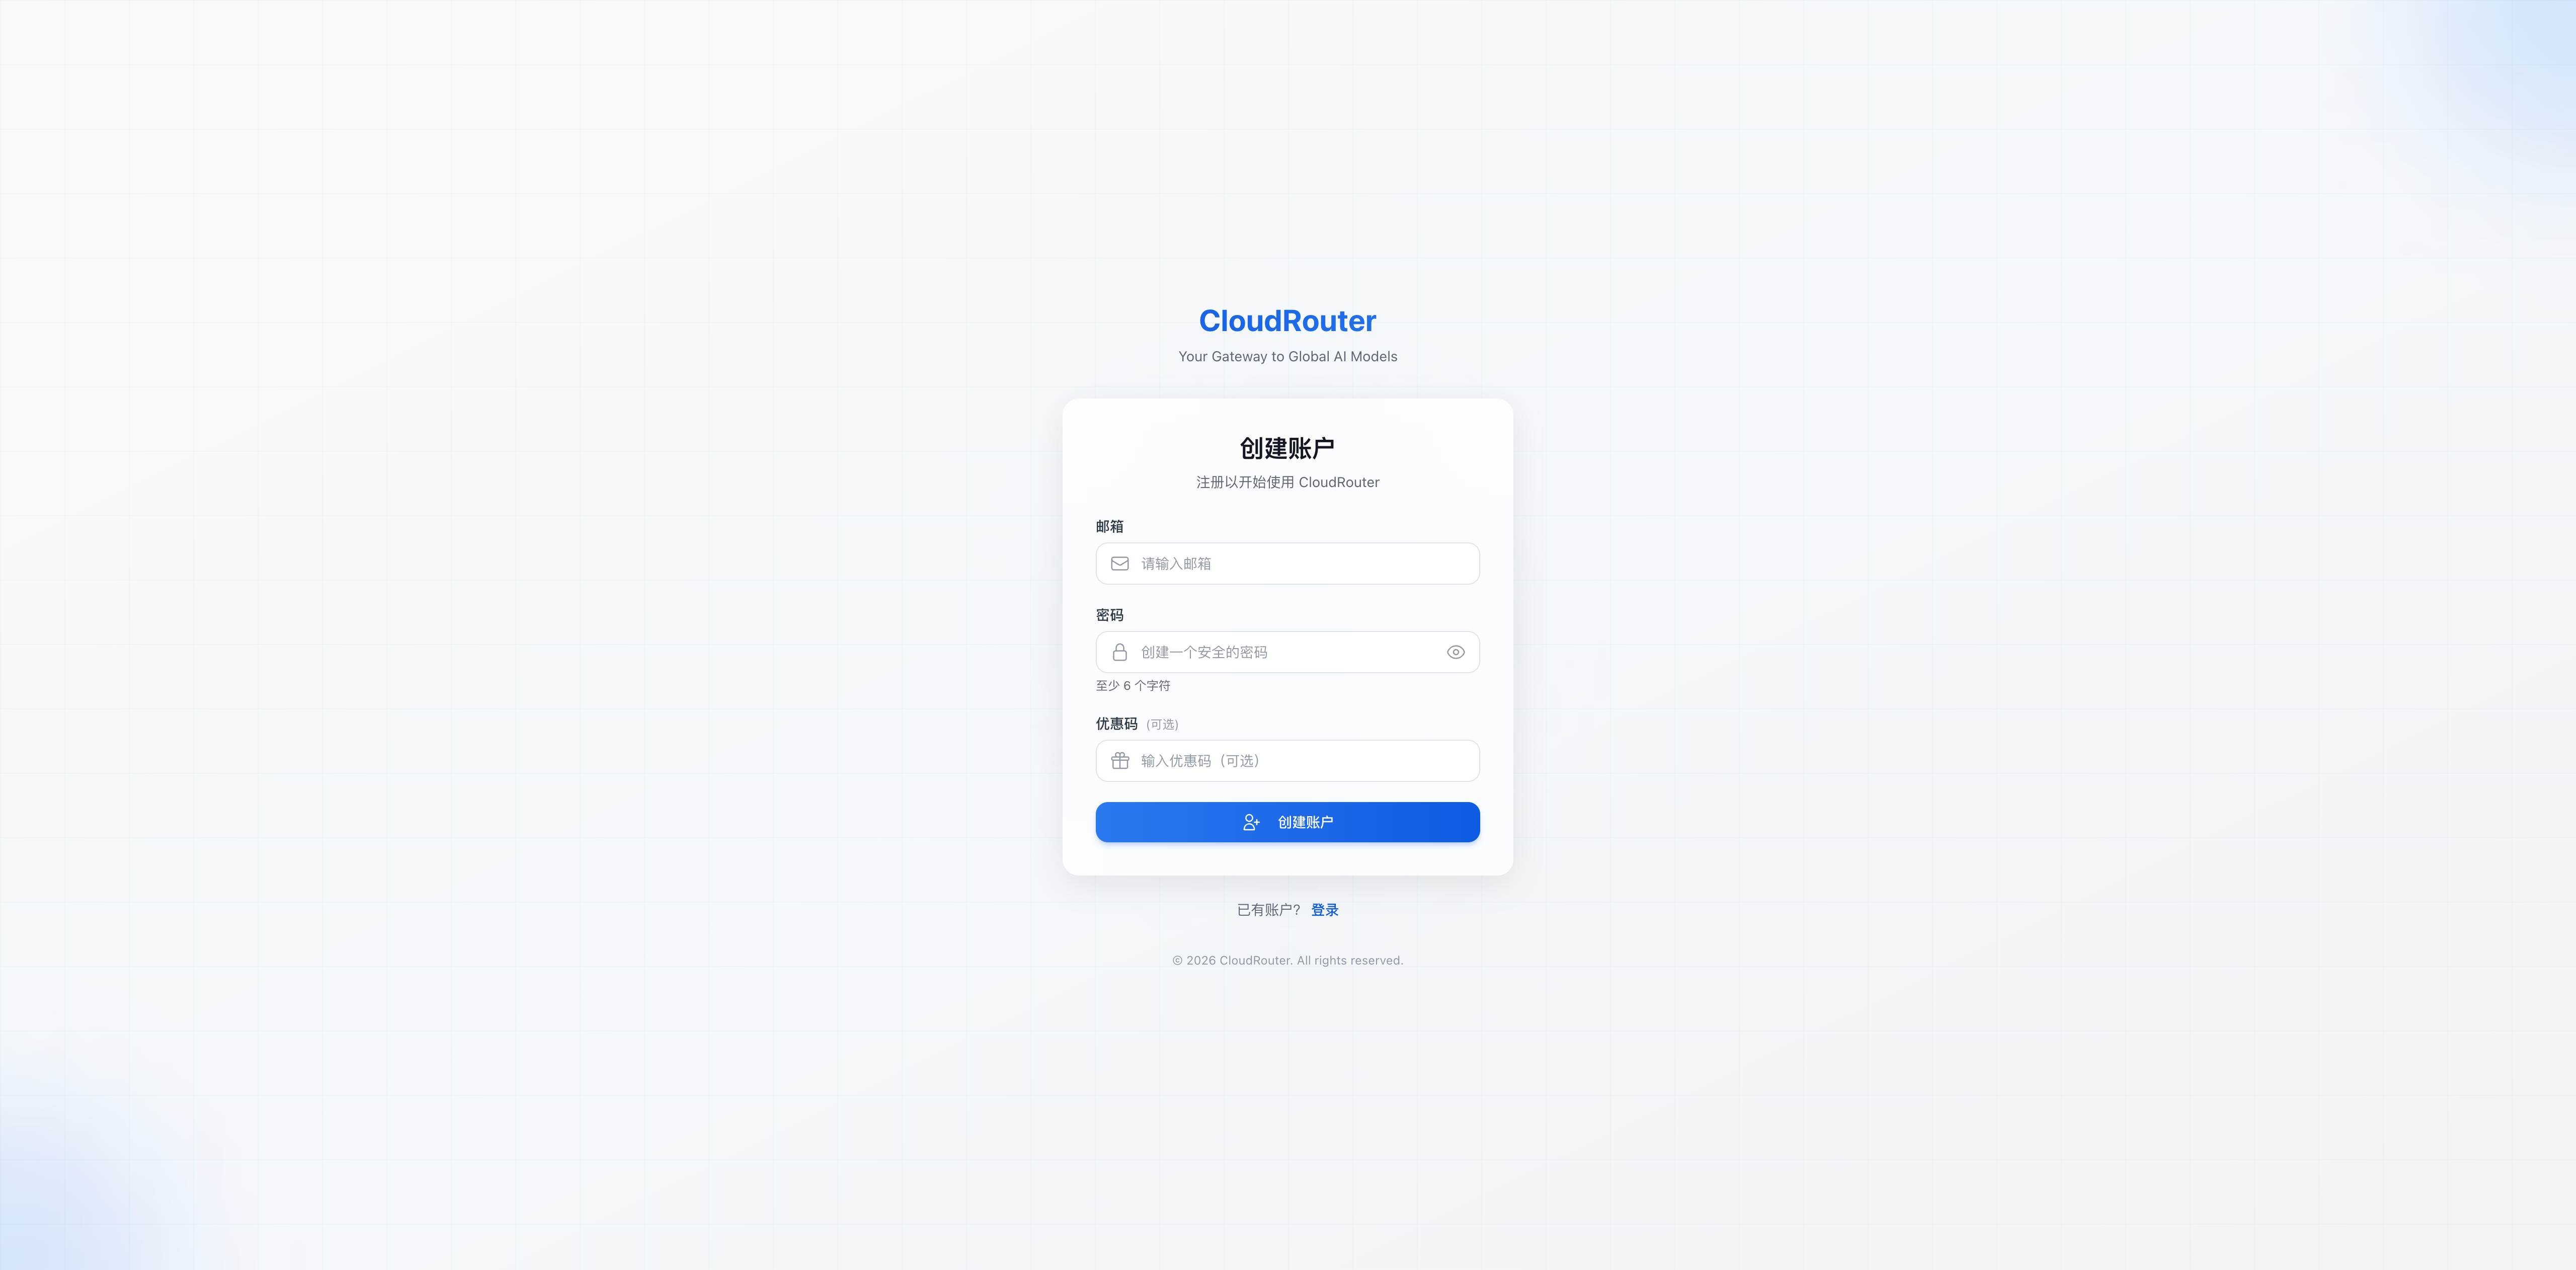
Step 2: Fill In Registration Information
Fill in the following on the registration page:
| Field | Required | Description |
|---|---|---|
| Yes | Enter a valid email address for receiving verification codes and system notifications | |
| Password | Yes | Login password; recommended to include uppercase and lowercase letters, numbers, and special characters |
| Region | Depends on page config | Displayed and required when the platform enables region-based access; hidden when not enabled |
| Invitation code | Depends on platform config | Required if the platform has enabled invitation-code registration; obtain from the platform |
| Promo code | No | If you have a valid promo code, enter it here; bonus credits are granted to the quota pool upon successful registration. Automatically filled in when accessed via a referral link |
The region field is only displayed when the platform enables region-based access. When enabled, it is required; when not enabled, the field does not appear on the registration page. After registration, you can view the models and groups available to your organization in the console.
The model scope is not determined by region selection. To add
deepseek-v4-flash,kimi-k3, or other available models, contact the platform to request group authorization. See Model Access and Group Authorization.
Step 3: Complete CAPTCHA Verification
After filling in the information, complete the CAPTCHA verification on the page to prove you are a real user.
Step 4: Agree to the Service Agreement
Check the agreement consent box at the bottom of the page. Click the "Terms of Service" or "Privacy Policy" links to view the full text.
Note: The submit button is only clickable after the agreement is checked. If you find that input fields or buttons on the page are unresponsive, you likely have not checked the agreement consent box.
Step 5: Submit Registration
After confirming the information is correct, click the button at the bottom. When email verification is enabled, the button reads "Continue" (because there is still a verification step); when email verification is not enabled, it reads "Create Account" directly.
Step 6: Verify Email
If the platform has email verification enabled, you will be redirected to an email verification page (titled "Verify Your Email") after submission:
- The system sends an email with a 6-digit verification code to the email address you provided
- Check your inbox and enter the verification code into the page input field
- Click "Verify and Create Account" -- registration is complete once verification passes
If you do not receive the verification email: check that the email address is correct, look in the spam folder, and click "Resend Verification Code" after the countdown expires. If you still cannot receive it, contact support.
Registration Complete
After successful registration, the system automatically:
- Creates your admin user account
- Sets you as the admin user of the organization
- Enables models based on organization authorization; contact the platform to request additional groups. See Model Access and Group Authorization
- If a valid promo code was entered, grants bonus credits to the quota pool
4. After Registration
After registration, you will be automatically logged in to the console. As an admin user, it is recommended to get started in the following order:
| Action | Description | Documentation |
|---|---|---|
| Top up the quota pool | Add credits via online payment or redeem codes | Top-Up and Redeem Codes |
| Create members and set quotas | Create member accounts and set quota pool limits | Member Management |
| Create API Keys | Create Keys and bind routing groups | API Keys and Routing Groups |
| View call names and integrate into code | Three viewing methods described in the documentation | Viewing Available Models |
5. FAQ
Q: Not receiving the verification email during registration? A: Check that the email address is correct, look in the spam folder, wait a few minutes, and retry. If you still cannot receive it, contact support.
Q: Registration says the email is already registered? A: The email already has an associated account. Log in directly, or use "Forgot Password" to recover access.
Q: Entered a promo code but did not receive bonus credits? A: The promo code may have expired, reached its usage limit, or been deactivated. This does not affect the registration flow -- registration completes normally, but no bonus credits are granted.
Q: Why are the input fields on the registration page unresponsive? A: Input and submit controls are disabled when the agreement consent box is not checked. Please check the Terms of Service and Privacy Policy consent box first.
Q: Can one person register multiple organizations? A: One email can only register one account. To use multiple organizations, the respective organization can add you as a member. See Member Management.
Q: What if I forgot my password? A: Click "Forgot Password" on the login page and follow the prompts to reset via email verification code.
Q: How do I add members after registration? A: As an admin user, create members in "Member Management". Members complete registration using an activation code. See Member Management for details.